-
Using PROG CHG / CC on the Akai LPD8 for quick program banks
The Akai LPD8 is a great (and cheap) MIDI controller with 8 pads and 8 knobs. It has 4 program banks, effectively letting you map 64 controls. However, switching between the 4 banks is cumbersome and slow. You have to first press PROGRAM, then pad 1 - 4 to select the bank, then finally PAD to get back into pad/note mode. There’s also no feedback as to which bank you are currently in. This combined, was almost enough to make me give up and just resort to using a single program bank, but I thought I’d look for other solutions first.
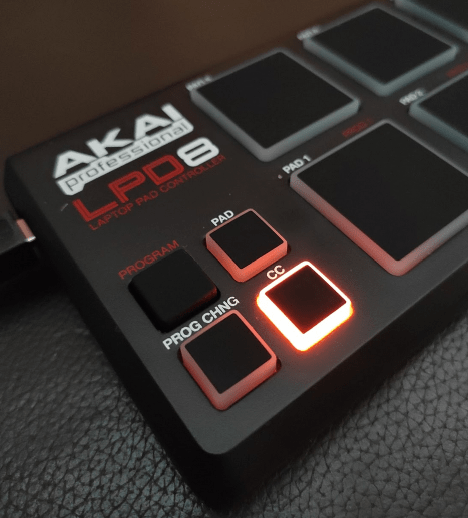
The controller has 3 modes: PAD, PROG CHG and CC with buttons for each which stay lit to indicate which mode you’re in. This gave me an idea, perhaps I could repurpose PROG CHG and CC modes to be additional program banks.
After a bit of research I discovered MIDI-OX. It’s an ancient MIDI utility which amongst other things, lets you monitor and mess with MIDI data streams. When in PAD mode, the LPD8 emits NoteOn / NoteOff events whenever the pads are pressed and release. PROG CHG mode produces a single ProgChg event when pressed. CC mode however, produces a Ctrl event with a velocity set on press and a Ctrl event with a velocity of 0 on release.
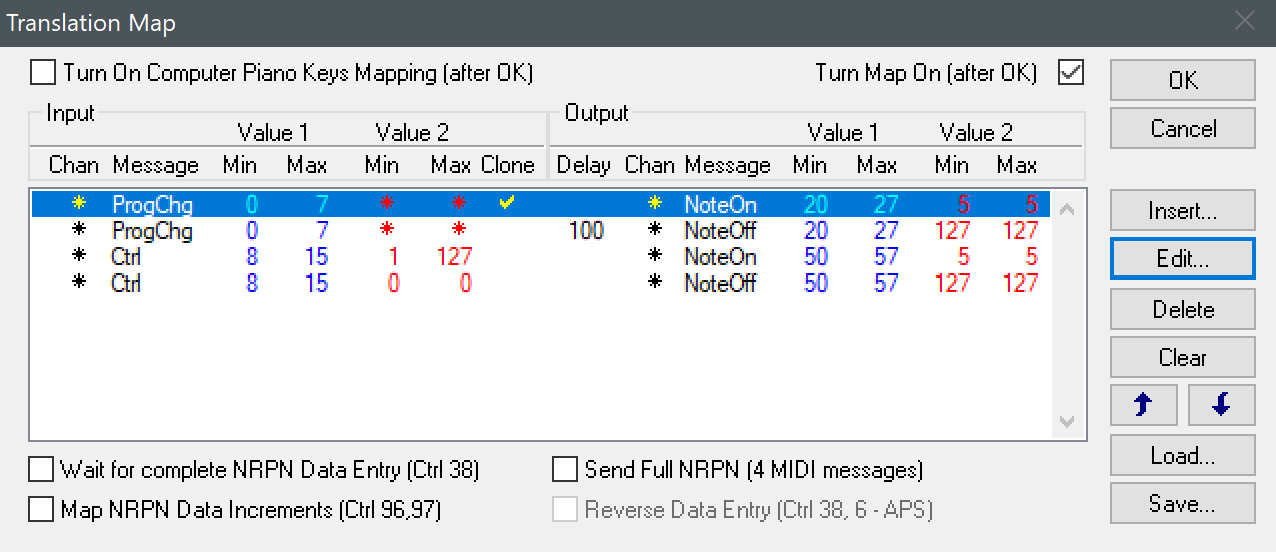
Mode Pad Press Pad Release Value Range PAD NoteOn NoteOff 36 - 43 (notes) PROG CHG ProgChg - 0 - 7 (cc) CC Ctrl Ctrl (with 0 velocity) 8 - 15 (cc) Using the Data Mapping function in MIDI-OX, I set up a mapping to listen for ProgChg events and emit NoteOn events instead. Setting the clone flag keeps the original ProgChg event around so a secondary mapping can emit the NoteOff event. I set a delay of 100 so it always occurs after the NoteOn. I set the output values range to 20 - 27 so that it would not overlap with existing functions.
The CC mapping was simpler, emitting NoteOn when Ctrl events are received with a velocity greater than 0. Then emitting NoteOff whenever Ctrl events with a 0 velocity were received. I used 50 - 57 as the output range.
The final data mappings looked like:
With everything now mapped I tested it out by pressing and releasing a pad in PAD mode, then PROG CHG and finally CC mode.
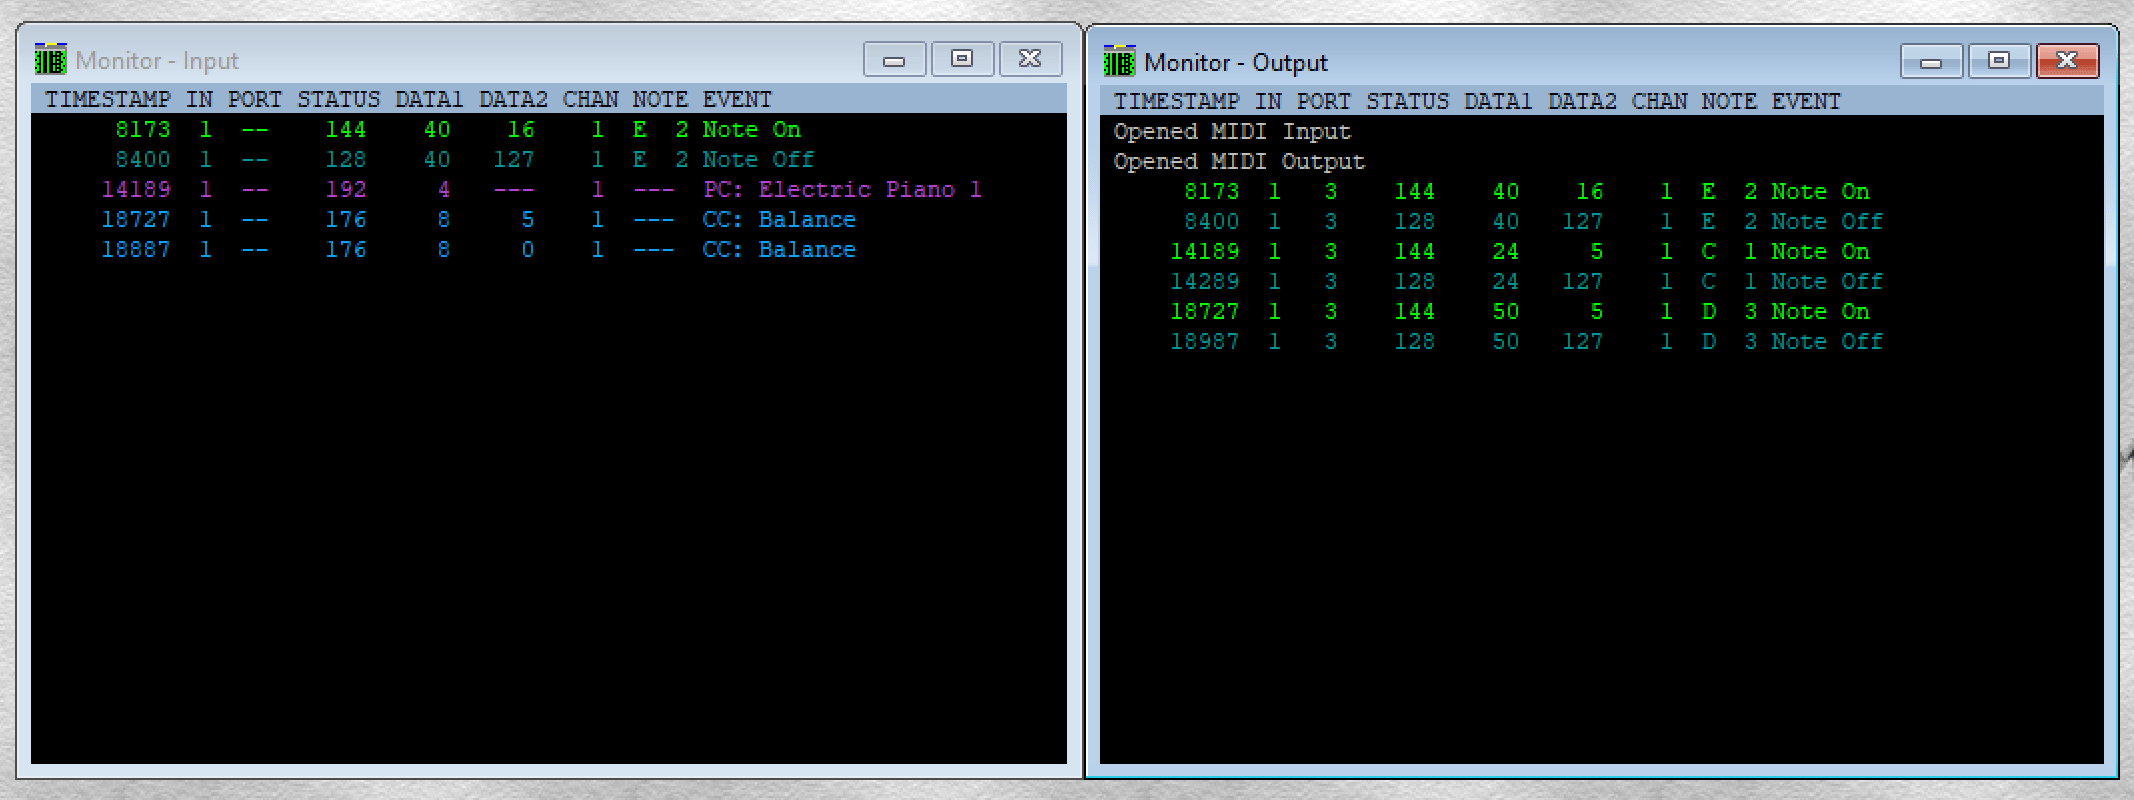
On the left are the original inputs and the on the right shows the new NoteOn / NoteOff events.
Success! I now have 3 program banks on the LPD8 which I can easily switch between with a single press on the fly.
-
Testing Docker images with Autotest
For awhile now, I’ve had a docker image which blindly gets rebuilt via dockerhub every time the upstream image changes. As the docker image I’m building just pulls bits and pieces from other sources, I didn’t really have anything to unit test as part of the CI process. Since it was working fine at the time, I just left it.
Fast-forward a few years and sure enough, one of the things I bundle into the image shipped a broken version. The docker build still succeeded, but the final image didn’t work as expected. Rather than let that happen again, I thought I should find a testing solution.
Docker’s Autotest looked like a good fit. It can run tests on new commits, PRs and crucially on upstream image changes. However, I was a bit confused how I could use it without bloating my image with tests embedded inside. Turns out it’s really simple using a multi-stage build.
Suppose we have the following trivial docker image, where we simploy add a dummy
example-appto the alpine image.FROM alpine:latest COPY app/ /app WORKDIR /app RUN ln -s /app/example-app /usr/local/bin/example-appWe can turn it into a multi-stage image with a testing layer.
# Create release layer and label it
FROM alpine:latest as release
COPY app/ /app
WORKDIR /app
RUN ln -s /app/example-app /usr/local/bin/example-app

# Create testing layer
FROM alpine:latest as test
COPY --from=release / /
COPY test/ /test
WORKDIR /test
ENTRYPOINT ["/bin/sh", "-c"]
CMD ["./tests.sh"]

# Output release as the final image
FROM release
First we build the regular image and label it
release. We then build a testing layer using release as a base and add in our tests. Here we just copy in a directory containing a bash script of arbitrary tests. The only requirement is that it exits with a0when tests pass, or anything else when they fail.Finally we call
FROM releaseto ensure that on a regular build, we only build the app without the testing layer.For Autotest to work, we need to create a
docker-compose.test.ymlfile with asutservice.version: "3.8" services: sut: build: context: . target: "test"We set the target to
testso that it builds and runs the test layer from our image. We can test it locally (with a deliberate test failure):$ docker-compose -f docker-compose.test.yml up sut ... sut_1 | Executing tests... sut_1 | OK - example-app should run fine sut_1 | FAIL - example-app should run fine sut_1 | PASSED: 1 FAILED: 1 docker-autotest-example_sut_1 exited with code 1Now that it works locally we just need to enable Autotest in the Dockerhub settings.
Full example repository: Autotest-example.
-
Monitoring home internet speeds with Smokeping and Speed Test
I’ve been monitoring my home internet’s uptime using Smokeping docker container for awhile now. But after finally switching from ADSL to a 100Mbps connection I thought it would be a good time to start also monitoring internet speeds.
Turns out there is an existing plugin, smokeping-speedtest for Smokeping which does the job.
For easy setup, I created a docker image to combine the plugin and it’s dependencies and with linuxserver’s docker-smokeping image as a base.
For configuration, I just followed the instructions and added the follwing to the
Probesfile.+ speedtest binary = /usr/local/bin/speedtest-cli timeout = 300 step = 3600 offset = random pings = 3 ++ speedtest-download measurement = download ++ speedtest-upload measurement = uploadI also added a new section to my
Targetsfile to perform speed tests against a local ISP.+ SpeedTest menu = Speed Tests title = Speed Tests ++ download menu = Download title = Download probe = speedtest-download server = 2173 measurement = download host = internode.on.net ++ upload menu = Upload title = Upload probe = speedtest-upload server = 2173 measurement = upload host = internode.on.netThe complete Dockerfile is on github and the image on Docker Hub.
- Older posts